

how to remove tarnish from costume jewelry: quick fix
We’ve all been there. You reach for that perfect statement necklace or your favorite pair of earrings, only to find them looking dull, dark, and sad. It’s a total bummer. But don't toss it just yet! You can bring most of your costume jewelry back to life with simple household staples you already have, like baking soda, dish soap, or lemon juice.
The golden rule? Always test a small, hidden spot first. This quick check ensures your chosen cleaning method won’t accidentally harm the delicate plating or finish.
Why Costume Jewelry Tarnishes and How to Fix It
Before you declare a piece a lost cause, let's get into what’s actually going on. Tarnish isn’t just grime or dirt—it’s a chemical reaction. Most fashion jewelry starts with a base metal like copper, zinc, or brass. A super-thin layer of gold, silver, or another shiny metal is then plated over it. When air and moisture sneak past that protective layer and hit the base metal, oxidation happens. That’s what creates that frustrating, dark film.
Think of this guide as your complete rescue mission for tarnished treasures. I’m sharing my favorite simple, safe, and shockingly effective methods to get those pieces sparkling again and back into your rotation.
The Everyday Culprits Behind Tarnish
So, what’s causing this annoying discoloration? It’s usually a reaction to everyday things your jewelry bumps into. The most common triggers are probably part of your daily routine:
- Moisture and Humidity: Storing your jewelry in a steamy bathroom is one of the fastest ways to invite tarnish.
- Chemicals in Cosmetics: That spritz of perfume, dollop of lotion, or cloud of hairspray contains ingredients that can speed up oxidation.
- Sulphur Compounds: Believe it or not, the air itself contains elements that react with metals.
This isn’t just speculation. An environmental study showed just how fast this can happen. Researchers found that exposing jewelry to sulfur compounds, even at a tiny concentration of just 15 parts per billion, created visible tarnish in only five days. The study also revealed that things like lotion and hand sanitizer caused noticeable darkening in the same short timeframe. It’s a stark reminder of how vulnerable our favorite accessories really are.
The best defense is a good offense. Honestly, preventing tarnish with smart storage and care is way easier than scrubbing it off later. This is why investing in quality, water-proof pieces from the start can be a total game-changer.
Of course, the best way to deal with tarnish is to sidestep it entirely. You can learn more about picking durable, tarnish-free jewelry that can handle daily life right here in our guide.
DIY Cleaning Solutions Hiding in Your Pantry
Forget making a special trip to the store for fancy cleaners. The secret to reviving your favorite costume jewelry is probably already hiding in your kitchen cabinet! With just a couple of common household items, you can whip up some seriously effective solutions that gently lift away tarnish without wrecking delicate finishes.
You're not alone if your first instinct is to grab something from the kitchen. A recent survey of jewelry owners across the US, UK, and Europe found that over 65% of people try a DIY cleaning method first. And what are their go-to solutions? You guessed it—a simple baking soda paste and a mild dish soap bath, which together make up a whopping 72% of all at-home cleaning attempts. There's a good reason for this: they actually work.
Let’s get into a few of my favorite recipes that will have your pieces sparkling again in no time.
The Gentle Baking Soda Paste
Got a piece with some stubborn, built-up tarnish? Maybe it’s that faux-silver chain that’s looking a little sad. This is where a simple baking soda paste comes to the rescue. It gives you just enough gentle grit to scrub away that dark layer without leaving a scratch.
Making it is a breeze. Just mix about two tablespoons of baking soda with one tablespoon of water. You’re looking for a thick consistency, almost like toothpaste. If it’s too watery, just sprinkle in a bit more baking soda.
Now, dab the paste onto the tarnished spots with your fingers or a soft cloth. Rub gently in small circles, focusing on the discolored areas. You’ll be amazed at how quickly you see the tarnish start to disappear. For all those tiny, intricate details, an old, soft-bristled toothbrush (a kid’s one is perfect) is your best friend here. After a minute or two, rinse the piece completely under cool running water.
The Simple Dish Soap Soak
Sometimes, all your jewelry needs is a good, relaxing bath. This method is my top pick for pieces with light tarnish or anything with delicate rhinestones or faux gems that you don't want to scrub. The trick is to use a very mild dish soap—nothing with heavy moisturizers or harsh chemicals.
Grab a small bowl, fill it with warm water, and add just a few drops of soap. Give it a little swish to create a sudsy solution. Pop your jewelry in and let it soak for about five to ten minutes. This gives the soap plenty of time to work its magic, breaking down any oils, lotions, and grime.
After the soak, gently wipe away any lingering residue with a soft cloth. If you're trying to clean around stone settings, a Q-tip dipped in the soapy water works wonders. Always, always finish with a good rinse under clean water to get rid of any soap film.
Pro Tip: Steer clear of hot water! Sudden temperature changes can sometimes crack faux gemstones or, worse, weaken the glue holding them in place. Lukewarm water is always your safest bet.
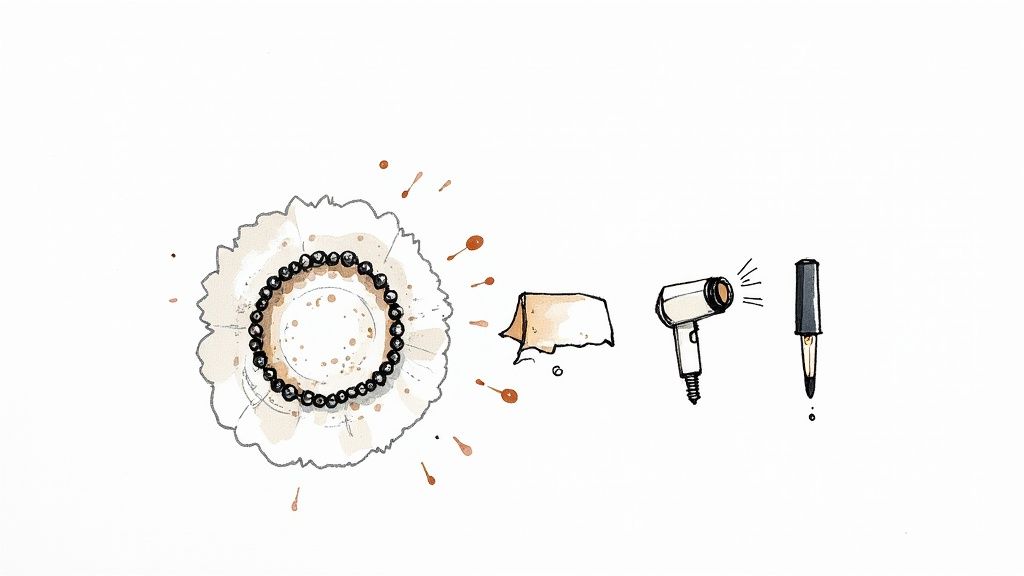
The Brightening Lemon Juice and Salt Scrub
When you need a little more oomph to cut through oxidation—especially on brass or copper-based pieces—this acidic duo works like a charm. The lemon juice dissolves the tarnish, while the salt provides a super gentle scrubbing action to help lift it all away.
Squeeze the juice of half a lemon into a bowl and mix in about a teaspoon of salt until you have a slushy paste. Dip a soft cloth or a cotton ball into your mixture and gently rub it onto the tarnished metal. I’d recommend keeping this one away from any pieces with stones, as the acid can be a bit too much for them.
This one works fast, so you only need to scrub for a minute or so. If you're curious about other ways to use pantry acids, check out our guide on how to clean jewelry with vinegar for some more great tips. After you’re done, a thorough rinse is non-negotiable to wash away every last trace of acid and salt.
Don't Skip This! The All-Important Spot Test
Before you even think about dunking that favorite necklace into a cleaning solution, hold on a second. I'm going to share the one step that can mean the difference between a sparkling revival and a heartbreaking disaster: the spot test. This isn't just some fussy, optional thing—it's honestly the most critical move you can make to protect your beloved costume jewelry.
Think about it. Most costume jewelry is a beautiful illusion. It’s made with thin metal plating, delicate coatings, and faux gemstones that can have a surprisingly dramatic, and often terrible, reaction to even the mildest homemade cleaners. A quick spot test is your insurance policy against turning a bit of tarnish into a patchy, peeled, and ruined mess. Trust me, it’s worth the extra minute.
How to Do a Spot Test the Right Way
The idea is simple: find a tiny, hidden area on your jewelry where no one will ever see the result. This becomes your safe little laboratory for checking how the cleaner and your piece get along before you commit to the whole thing.
Look for discreet places like:
- The back of a pendant or earring
- The inside of a ring or bracelet band
- Right next to the clasp on a necklace
Got your spot? Great. Now, just dip a cotton swab or Q-tip into a tiny amount of the cleaning mixture you want to use. Gently dab it onto your chosen hidden area and let it sit for about a minute. Then, come back with a different, slightly damp swab to wipe it clean, and immediately dry it with a soft cloth.
What to Watch Out For
Okay, now for the moment of truth. Grab your piece and get it under a good light. You’re playing detective here, looking for any red flags that tell you to stop what you're doing.
My Golden Rule: If you see any discoloration, flaking, pitting, or even just a subtle dulling of the finish, that cleaning method is a no-go for that piece. It's way better to live with a little tarnish than to accidentally strip the plating right off.
Sometimes, you might see a green or black residue. That's a sign that the cleaner is reacting with the base metals underneath the plating. We actually have a whole guide that dives into why some jewelry turns your skin green, and the science behind it is pretty fascinating.
This quick visual guide can also help you decide which method to even test in the first place, depending on how tarnished your jewelry is.
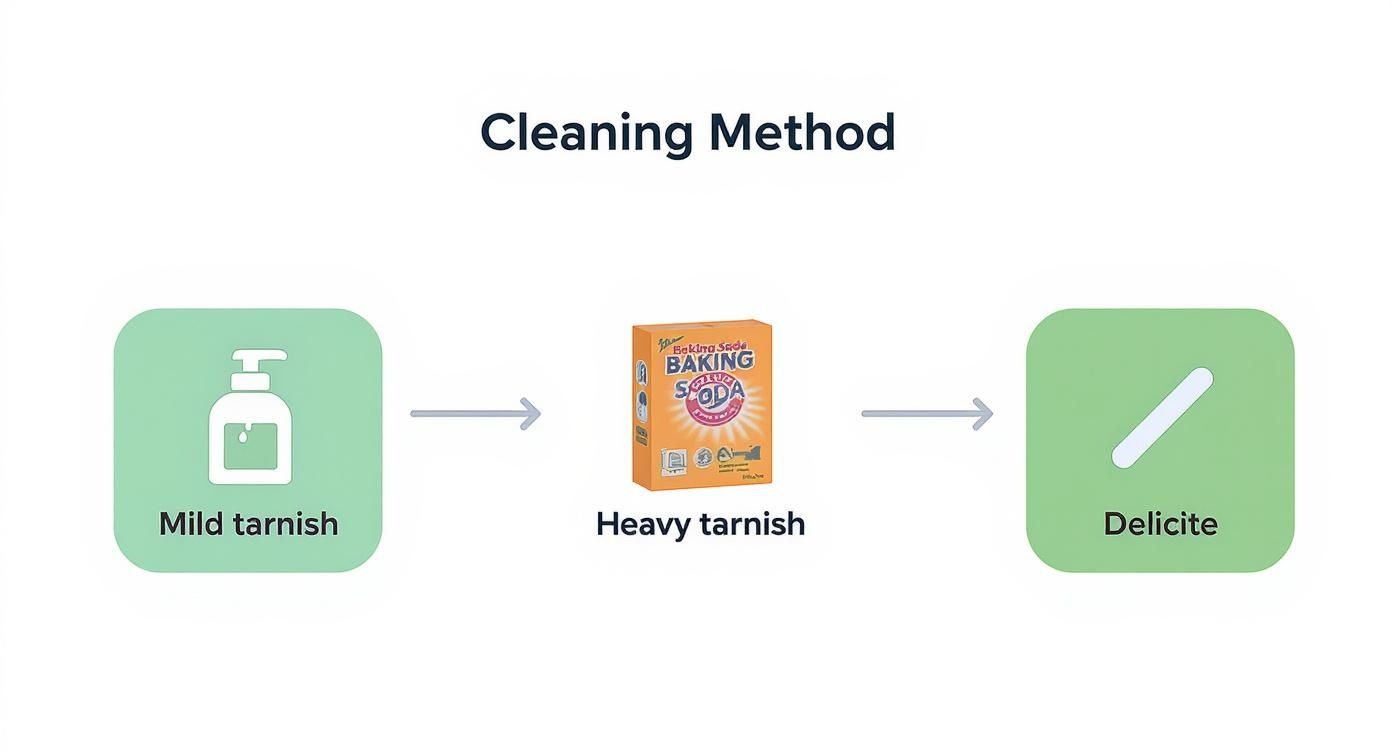
As you can see, a gentle soap solution is perfect for light tarnish. For tougher jobs, a baking soda paste gives you more cleaning power, while simply using a Q-tip is the safest bet for the most delicate items.
If your spot test gets the all-clear, you’re good to go! You can now move forward with confidence and get the rest of your piece looking fabulous again.
Mastering the Art of Drying and Polishing
You did it! You’ve banished the tarnish and brought your favorite piece back from the brink. But hold on—don't toss it back in the jewelry box just yet. This final stage is what separates a decent cleaning from a dazzling, long-lasting restoration.
Think of it this way: lingering moisture is public enemy number one for costume jewelry. Even a single, microscopic droplet hiding in a clasp or a stone setting is an open invitation for tarnish to creep right back in. A quick pat-down simply won't do the trick.
The Secrets to a Bone-Dry Finish
Your first move is to grab a soft, lint-free cloth. A microfiber cloth is perfect, but a clean, old cotton t-shirt works wonders, too. Gently pat the jewelry all over, absorbing every bit of surface moisture. The key here is to be gentle; aggressive rubbing can scratch or even strip away delicate plating.
Now, for those beautiful, intricate pieces—think filigree rings, detailed charms, or complex chains—we need to call in the special forces. I’m talking about your hairdryer.
Crucial Tip: I cannot stress this enough: always use the coolest, lowest setting on your hairdryer. High heat is a disaster for costume jewelry. It can warp soft metals, melt the glue holding rhinestones, and cause damage you just can't undo.
Hold the dryer a good six inches away from the piece and let the cool air gently flow over it. Pay special attention to all the nooks and crannies. This little trick is an absolute game-changer for getting every last bit of hidden moisture out.
Buffing Your Way to a Brilliant Shine
Once your jewelry is completely dry, it's time for the magic touch: the final buff. This is what really brings back that high-gloss, "like new" sparkle. For this, a dedicated jeweler’s polishing cloth is your best friend. They're designed to be ultra-soft and won't leave any scratches behind.
Using small, circular motions, gently rub the metal surfaces. You'll be absolutely amazed at the difference this step makes. It takes the piece from just "clean" to truly radiant.
Lock in the Sparkle with This Pro Trick
Want to keep that brilliant shine around for a lot longer? I’ve got a fantastic little secret for you, especially for pieces you wear all the time.
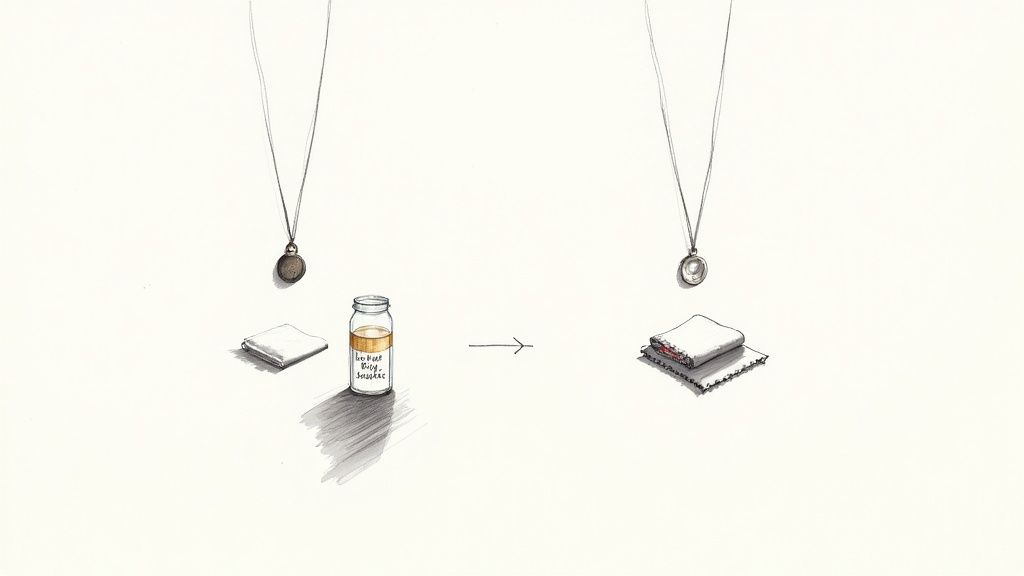
After your jewelry is perfectly clean and bone-dry, apply a super thin, even layer of clear nail polish to the metal.
This creates a clear, protective shield between the metal and the elements (like air and moisture) that cause tarnish. I like to focus on the parts that touch my skin the most, since the oils and acids on our skin are major tarnish culprits. Just let the polish dry completely before you wear it, and get ready to shine
Keeping Your Jewelry Tarnish-Free for Good
While it’s great to know how to rescue a tarnished piece, wouldn't it be amazing if you never had to? Honestly, the best defense is a good offense. Preventing tarnish from ever starting is all about building a few simple, smart habits that shield your favorite accessories from the things that make them look dull.
With just a few small tweaks to your daily routine, you can spend way less time scrubbing and a whole lot more time enjoying your collection.
The single most important rule I live by is "last on, first off." This one habit is a total game-changer, I promise. Think about it: your morning is filled with lotions, perfumes, hairspray, and makeup. All of those products contain chemicals that are basically kryptonite for the delicate plating on most costume jewelry.
By making your accessories the absolute final touch before you walk out the door, you keep them safe from that tarnish-inducing cocktail. Then, at the end of the day, your jewelry should be the very first thing you remove before you even think about washing your face or applying night creams.
Your Jewelry Box Is Your Best Friend
How you store your jewelry is just as critical as when you wear it. I see it all the time—people just tossing their pieces into an open dish on the dresser. That’s a recipe for disaster! It leaves everything exposed to open air and humidity, the two main culprits behind oxidation. Your goal should always be to limit that exposure as much as possible.
Here are a few of my go-to storage solutions that really work:
- Go Airtight: Small, individual zip-top bags are fantastic and cheap. A jewelry box with a lid that seals tightly is even better. I always squeeze the excess air out of the bags before sealing them for that extra layer of protection.
- Use Anti-Tarnish Strips: These little paper tabs are miracle workers. They literally absorb the airborne pollutants that cause tarnish. Just toss one into your jewelry box or bag and swap it out every few months.
- Divide and Conquer: Always store pieces individually. It stops them from scratching each other, and you won't have to deal with the nightmare of tangled chains—which, by the way, creates friction that wears down plating even faster.
Let's get real for a second. The reason most costume jewelry tarnishes is because it’s made from base metals like copper or brass, which are then coated with a super thin layer of a prettier metal. This plating is what reacts to air and moisture. While prevention is everything, if you're in a pinch, old-school methods like a lemon juice and salt soak can work wonders. Just letting a piece sit for about 10 minutes can lift a surprising amount of discoloration. You can even apply a clear coat of nail polish afterward to create a barrier and prevent those dreaded green stains on your skin. For more on historical cleaning methods, check out these great tips on removing tarnish from silver jewelry on craftaholique.com.
Water Is Not Your Friend
This is a big one: water is the absolute enemy of most costume jewelry. That means your favorite necklace should never join you in the shower, for a swim in the pool, or during a sweaty gym session. Chlorine, saltwater, and even your own sweat are incredibly corrosive and will break down protective coatings in no time.
My Personal Rule: If I'm about to do anything that involves water or serious sweat—from washing dishes to going for a run—my rings, bracelets, and necklaces are the first things to come off. It's a non-negotiable habit that has saved countless pieces in my collection over the years.
Ultimately, adopting these habits completely changes your relationship with your jewelry. You stop seeing it as disposable and start seeing yourself as its protector. It’s the simplest way to ensure every piece stays as vibrant and beautiful as the day you fell in love with it, building a collection you can rock for years to come.
Still Have Questions? Let's Talk Costume Jewelry Cleaning
Got a few more questions rattling around? You're definitely not the only one. When it comes to figuring out how to get tarnish off costume jewelry, a lot of common dilemmas pop up. Getting the right answers can mean the difference between saving a favorite piece and accidentally destroying it.
One of the biggest myths I see floating around the internet is the toothpaste trick. Seriously, just don't do it. While it sounds like a clever DIY hack, it's a fast track to ruining your jewelry. Toothpaste is made with mild abrasives to scrub tough tooth enamel, and that same gritty texture will strip the thin, fragile plating right off your accessories. It causes scratches and permanent damage you can't undo.
Instead, stick with something much gentler, like a soft paste made from baking soda and water or a simple bath in some mild dish soap. Your jewelry will thank you.
What About Pieces with Gems and Pearls?
Things get even trickier when you're dealing with jewelry that has faux gemstones, sparkly rhinestones, or delicate imitation pearls. Most of the time, these little beauties are just glued on, which makes them super sensitive to moisture.
Here’s a hard and fast rule: never, ever submerge these pieces in water or any cleaning solution.
The liquid seeps underneath and dissolves the glue, causing your stones to fall out. It can also get trapped behind the gems, making them look cloudy and lifeless.
You need a more targeted approach for these delicate items:
- First, dip a Q-tip or a small cotton swab into your cleaning solution.
- Gently and carefully clean the metal around the settings. Try your best not to touch the stones directly.
- Immediately follow up with a different cloth that's just slightly damp with plain water to wipe away any residue.
- Finally, pat the entire area completely dry with a soft, clean cloth.
This gives you total control to clean the metal without risking the embellishments.
Knowing When It's a Lost Cause (or Time to Call a Pro)
So, when is a piece of jewelry just too far gone? It’s crucial to know the difference between simple surface tarnish and permanent damage. You'll need to look closely for signs that the plating itself is compromised.
If you're seeing green or black spots that seem pitted into the metal, or if the gold or silver color has worn away completely to show the brassy base metal underneath, that's permanent damage. A good cleaning will get rid of the surface grime, but it can't bring back plating that's already gone.
And what about calling in a professional? If a piece is a treasured family heirloom, a delicate vintage find, or has super intricate details you're nervous about tackling, your best bet is to consult a professional jeweler. They have the experience and specialized tools to handle fragile items safely. They can also tell you if a piece is a good candidate for replating.
Honestly, tired of the whole tarnish battle? The easiest way to deal with it is to avoid it in the first place by choosing jewelry that’s built for real life. The Wen-Kelli collection is designed to be water- and sweat-proof, so you can wear your favorite pieces all day, every day, without them fading or turning. Check out the full collection of gorgeous, durable jewelry over at https://www.wen-kelli.com.
