

How to Measure Ring Size at Home: Quick & Accurate Guide
Ready to find your perfect ring size without ever leaving the house? You absolutely can! The fastest way to measure your ring size at home is surprisingly simple: grab a piece of string or a thin strip of paper, wrap it around your finger, and compare that length to a sizing chart. It’s a nifty little trick that turns basic household items into your secret weapon for online jewelry shopping.
Your Guide to an Accurate At-Home Measurement
Let’s be honest, finding the right ring size online can feel like a total shot in the dark. Nothing’s worse than the crushing disappointment of finally receiving that beautiful ring you’ve been eyeing, only to find it won’t slide past your knuckle… or it’s so loose it’s constantly spinning. But I’ve got great news for you! There are several fantastic, reliable methods you can use right now, and I’m going to walk you through all of them.
With so many of us shopping for jewelry online these days, getting that at-home measurement right is more important than ever. A 2020 survey actually found that over 65% of people bought their rings online, and a whopping 42% of them used at-home methods just like these. The catch? The same survey noted that 18% of those rings still had to be resized, which just goes to show how critical a careful, precise measurement really is. You can read more about these fascinating ring sizing trends from The Knot.
This infographic is a fantastic visual guide, breaking down the simple steps for the most popular DIY methods.
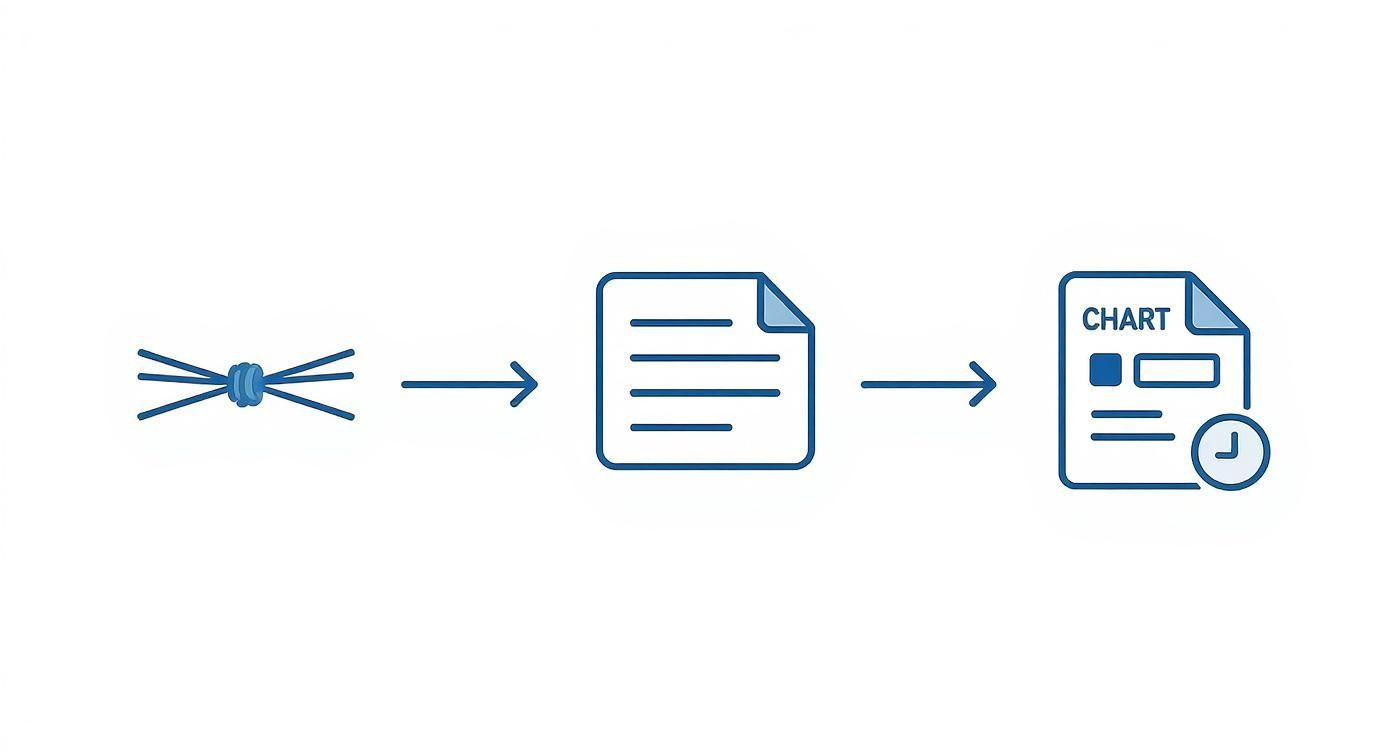
As you can see, whether you use string, paper, or a printable chart, the core process is always the same: wrap, mark, and measure. It’s that easy!
Choosing Your Best Method
Before you start wrapping, let’s quickly break down the different approaches. Understanding the pros and cons of each will help you pick the perfect method based on what you have on hand and how precise you need to be.
Key Takeaway: If there's one piece of advice I can give, it's this: consistency is everything. Our fingers swell and shrink throughout the day, so measure your finger two or three times—maybe once in the morning and again in the evening—to find your true average size. This tiny bit of extra effort makes a world of difference in getting a comfortable, perfect fit.
Here’s a quick look at the three main DIY ring sizing methods, highlighting their pros, cons, and the simple tools you'll need for each.
Comparing At-Home Ring Sizing Methods
| Method | What You Need | Pros | Cons |
|---|---|---|---|
| String or Floss | String, dental floss, pen, ruler | Super easy and uses common household items. | The string can stretch or slip, leading to inaccuracies. |
| Paper Strip | Paper, scissors, pen, ruler | More stable than string and less likely to stretch. | Can be a bit stiff and may not wrap as snugly around the finger. |
| Printable Chart | Printer, scissors, credit card (for scale) | Often the most accurate DIY method. | Requires a printer and careful cutting for correct results. |
Each of these techniques has its own vibe—from the sheer convenience of the string method to the spot-on precision you can get with a printable chart.
Once you’ve nailed down your measurement, you’ll be all set to browse with confidence and find a piece you’ll treasure forever. Getting the size right from the get-go makes the whole experience so much more fun, especially when you’re ready to explore our gorgeous collection of Wen-Kelli rings.
The Classic String and Paper Strip Methods
Ready to play jeweler for a day? Let's dive into two of the easiest, most classic ways to measure your ring size right at home: the string method and its trusty sidekick, the paper strip method. These are my go-to recommendations for a quick measurement because, let's be honest, you've got everything you need lying around the house already.
The whole idea is beautifully simple: wrap it, mark it, and measure it. But the real magic—and the key to getting a size you can trust—is all in the details. Getting the tension just right and marking your spot with pinpoint accuracy makes all the difference.
Getting Started with String or Paper
First things first, let's gather our tools. You'll want to find a non-stretchy piece of string (dental floss is a fantastic substitute!) or cut a thin, straight strip of paper. You’ll also need a super fine-tipped pen and a ruler that measures in millimeters—those tiny increments are everything when it comes to ring sizing.
Got your gear? Great. Now, wrap the string or paper snugly around the base of the finger you're sizing. The goal here is "snug but not tight." It should feel comfortable, like a perfectly fitting ring, but secure enough that you don't worry about it flying off.
One of the biggest mistakes I see people make is yanking the string too tight. This can stretch it out and give you a measurement that's way too small. Just imagine how a real ring would feel—it should sit comfortably, not squeeze the life out of your finger.
My Pro Tip: Once you've wrapped the string or paper, try sliding it back and forth over your knuckle. A ring has to get past that joint! If it gets completely stuck, your measurement is too tight. The perfect fit should require just a little bit of a wiggle to get over the knuckle.
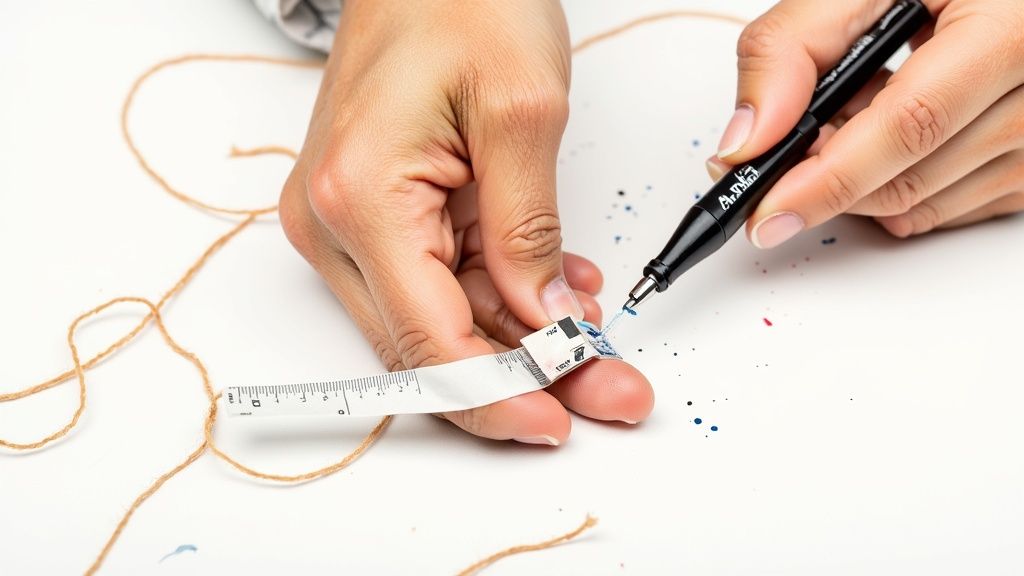
Marking and Measuring for Success
With the sizer perfectly wrapped, use your pen to make a sharp, clean mark right where the end overlaps. This little dot is your golden ticket, so be precise! A tiny smudge can be the difference between a size 6 and a 6.5.
Next, gently unwrap the string or paper and lay it out flat against your ruler. Measure the distance from the very end to the mark you just made, and be sure to read it in millimeters. That number is the circumference of your finger.
Now you can take that measurement and match it up with an international ring size chart to find your perfect size. For example, if you measure 54.4 mm, you're typically looking at a US size 7.
It might sound old-school, but this method is surprisingly accurate when you take your time. In fact, a 2017 study showed that the string method got within 0.3 ring sizes of a professional measurement in 78% of cases. And a 2021 survey found that 63% of customers still love this technique for its simplicity. You can find more cool ring sizing trends at Bryan Anthonys.
To really nail your measurement, keep these quick tips in mind:
- Measure Twice (or Thrice!): Our fingers swell and shrink all day. Measure a few times—maybe morning, afternoon, and night—to find the most consistent number.
- No Stretch Zone: Whatever you do, don't use anything with elastic, like a rubber band. It will completely throw off your results.
- Fine-Tip for the Win: A big, chunky marker can easily add a millimeter to your measurement, which is enough to put you in the wrong size category. Stick to something sharp
Using a Printable Ring Sizer with Confidence
If you want to level up your accuracy without spending a penny, the printable ring sizer is your new best friend. Seriously, think of it as the next best thing to a professional jeweler's tool! It's an amazing way to measure your ring size at home with way more precision than the string or paper methods.
There's just one crucial catch: you have to print it to the correct scale.
This little detail is everything. If the scale is off by even a hair, your measurement will be completely wrong. But don't sweat it! Verifying the scale is super simple and literally takes seconds.
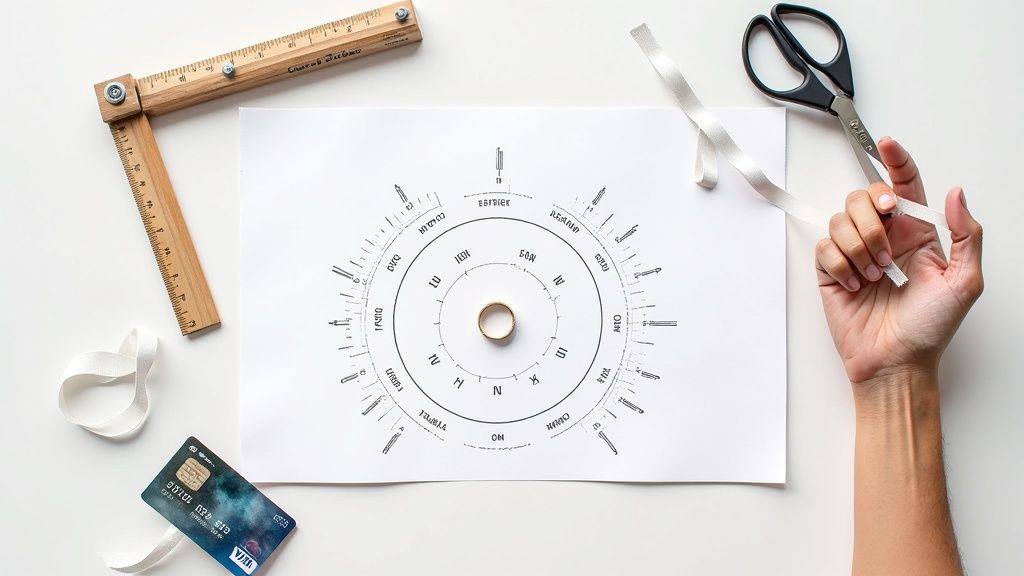
Ensuring Your Printout Is Perfect
Before you even think about grabbing the scissors, you must check the scale. Head to your printer settings and make absolutely sure the scale is set to 100% or "Actual Size." You'll want to uncheck any pesky options like "Fit to Page" or "Scale to Fit," because those will automatically shrink the chart and ruin your results.
Got it printed? Great. Now, grab a ruler or even a credit card.
- Ruler Check: Most printable sizers have a measurement line printed right on them (like a 1-inch or 20mm line). Just hold your ruler up to it and confirm it matches perfectly. Easy.
- Credit Card Check: Some charts have a clever little box designed to be the exact size of a standard credit card. If your card fits neatly inside the lines, you’ve nailed the printing process.
This quick double-check is your guarantee that the sizes on that piece of paper are true to life.
Two Types of Printable Sizers
Printable guides usually come in two handy formats, each perfect for a different situation.
One type has a bunch of circles, each one representing a different ring size. For this, you’ll need a ring you already own that fits you perfectly. Just place it over the circles until you find the one where the inside edge of your ring lines up exactly with the circle's outline.
The other kind is a cut-out sizer that you actually wrap around your finger—perfect if you don't have a go-to ring to measure against.
Pro Tip: When you're using the cut-out sizer, pull it snug, but not too tight. It should feel secure at the base of your finger, but you have to be able to slide it back over your knuckle with just a little bit of effort. The biggest mistake people make is forgetting that the ring has to get past that joint!
For instance, if the sizer says you're a size 7 but you really have to wrestle it over your knuckle, that’s a clear sign you should probably size up to a 7.5 for a comfortable fit. This is what makes the printable tool so great—it gives you a real feel for how the ring will slide on and off.
Pro Tips for Nailing the Perfect Fit
Getting a measurement is one thing, but getting the right one? That's the real secret. I'm going to share some insider knowledge that we jewelers use to ensure a perfect fit every single time. These aren't just minor suggestions; they're the game-changing details that prevent the disappointment of a ring that spins, slides, or just won't go on.
Ever noticed your rings feeling a bit snug in the summer or after a salty meal? It's not in your head! Our fingers are constantly changing size, influenced by everything from the temperature to the time of day.
Find Your Perfect Timing
Timing is absolutely everything when you're measuring your ring size. Your fingers are usually at their smallest first thing in the morning or when your hands are cold. Measuring then is a surefire way to end up with a ring that feels uncomfortably tight later on.
For the most reliable result, measure your finger in the late afternoon or evening. This is when your body temperature is more stable, and your fingers are at their natural, slightly larger state. It gives you the most accurate picture of your true size.
A fascinating 2022 global analysis I came across really drove this home. It found that finger sizes can fluctuate by up to 1.5 sizes throughout the day! The study also noted that fingers are typically largest in the evening, which is why 34% of people who measured at home ended up doing it more than once to find their true fit. You can dive deeper into these insights on ring size fluctuations from Monisha Melwani.
Conquer the Knuckle Conundrum
So, what do you do when the base of your finger is slimmer than your knuckle? This is an incredibly common issue, and it can make finding the right size feel like an impossible puzzle. If you size for the base, you can't get the ring on. Size for the knuckle, and the ring spins like a top once it's in place.
Here’s the trick I always recommend:
- First, carefully measure the base of your finger.
- Next, measure your knuckle.
- Finally, choose a size that falls right in between those two measurements.
This simple approach ensures the ring is just snug enough to slide over the knuckle with a little twist but won't be loose enough to constantly drive you crazy. It’s the perfect compromise for a secure, comfortable fit you'll barely notice.
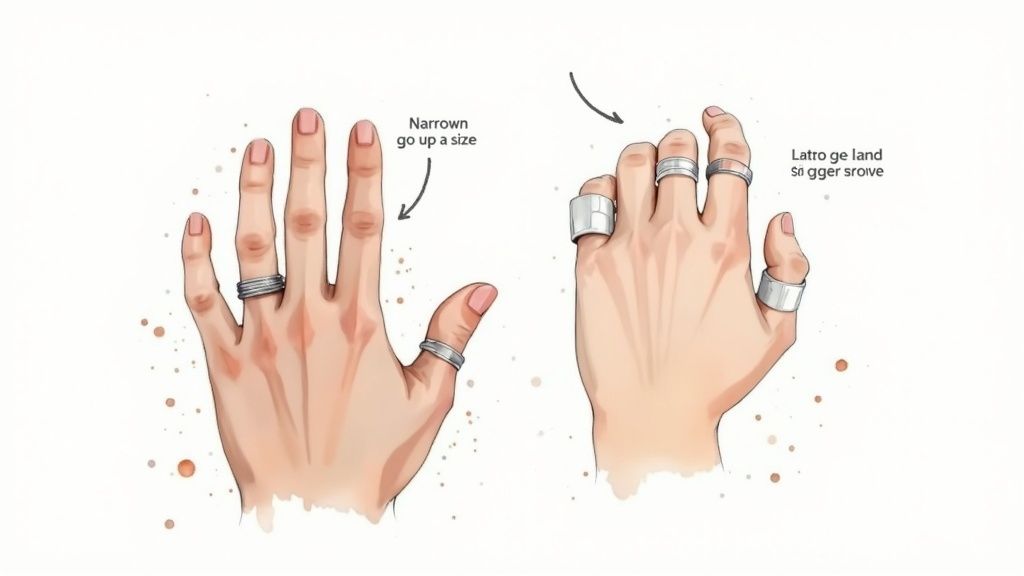
Don't Forget to Consider the Band's Width
One of the most overlooked—and most important—factors in ring sizing is the width of the band itself. It makes a huge difference! A wider band covers more skin, which creates more friction and a much snugger feel. Think of it like wearing a wide belt versus a thin one; the wider style always feels more restrictive.
Jeweler's Rule of Thumb: For any ring band wider than 6mm, you should always size up by at least a half-size. If you're looking at an extra-wide band (8mm or more), you might even want to go up a full size for maximum comfort.
For example, if you measure as a perfect size 7 for a delicate, thin band, you’d want to order a 7.5 for a gorgeous, substantial piece like our Wen-Kelli Freya Ring. This simple adjustment is the secret to wearing bold, statement rings without them ever feeling too tight. Trust me, it makes all the difference for all-day comfort.
When It's Time to Call in a Professional Jeweler
Knowing how to measure your ring size at home is a fantastic skill, but let's be real—some situations just demand the laser-focused precision of a pro. Think of it as calling in the experts for the jobs where "close enough" just won't cut it. Especially when you’re investing in a forever piece.
Take eternity bands, for example. Those gorgeous rings with diamonds wrapping all the way around? They are a professional-only measurement, no exceptions. Because of that continuous design, most eternity bands cannot be resized. Getting the size wrong from the start is a heartbreakingly expensive mistake. A quick trip to the jeweler provides the peace of mind you need.
When Professional Sizing Is a No-Brainer
Beyond specific ring styles, there are a few other times when heading to a jewelry store is just a smart move. If you've tried the DIY methods and keep landing somewhere between two sizes, a jeweler will be your tie-breaker. Their calibrated tools are designed for accuracy and take all the guesswork out of the equation.
It's also a great idea if your fingers have a unique shape. A common one is having knuckles that are much larger than the base of your finger. A professional can find that sweet spot—a size that’s just big enough to slide over the knuckle but snug enough that it won't spin around once it's on.
A professional fitting offers something you just can't replicate at home: the chance to physically try on rings of different widths. You'll be amazed at the difference between how a delicate 4mm band feels compared to a bold 8mm one. This hands-on experience is invaluable for finding your true comfort zone.
Finally, if you’re about to purchase a high-value piece like an engagement ring or a milestone anniversary gift, go see an expert. The confidence you'll gain from a professional sizing is absolutely priceless.
And of course, if you ever have questions about a specific ring or just want some expert advice, please don't hesitate to contact our team at Wen-Kelli. We're always here to help you find that perfect, once-in-a-lifetime fit.
Your Top Ring Sizing Questions, Answered
Alright, so you've measured, maybe even double-checked, but you still have a few questions. That's totally normal! Finding your perfect ring size is a big deal, and it's smart to make sure you've got all the details right. Let's dig into some of the most common questions that come up when you measure your ring size at home, so you can feel completely confident in your number.
What if I’m Stuck Between Two Sizes?
This is probably the most common sizing puzzle people run into. It's that classic debate: go smaller for a secure fit, or bigger for a little wiggle room? The secret almost always lies in the style of the ring you’re dreaming of.
For a super delicate, thin band, I almost always suggest going with the smaller of the two sizes. A thinner ring needs to be snug so it doesn’t slip around or, worse, slip off entirely.
But if you've got your heart set on a statement piece—a wider band of 6mm or more—you should absolutely size up. Wider rings take up more real estate on your finger, which means more friction and a much tighter feel. Sizing up just a bit ensures you can wear it all day without it feeling constricting.
My Go-To Advice: Think about how your hands change throughout the day. Do they swell a bit in the summer heat or after a good workout? If so, that slightly larger size will be a lifesaver. When in doubt, sizing up is usually the safer bet. A jeweler can typically size a ring down more easily than they can size one up.
How Can I Secretly Find My Partner's Ring Size?
Welcome to Mission: Ring Size! This takes a bit of clever planning, but you can absolutely pull it off. The most foolproof method is to borrow a ring they already wear on the correct finger and hand. Just pick one you know they won't miss for a day or two!
Once the ring is in your possession, you've got a couple of solid options:
- Use a Printable Sizing Chart: Grab a chart and lay the ring over the circles until you find the one that fits perfectly. The inside edge of the ring should line up exactly with the outer edge of the circle.
- Trace the Inside: This is a surprisingly accurate trick. Place the ring on a piece of paper and carefully trace the inside circle. A good jeweler can often figure out the size from a precise tracing.
If swiping a ring is just too risky, it's time to bring in reinforcements. Ask a trusted friend to help! They could suggest a casual "let's try on jewelry" moment during a shopping trip. The last-ditch effort? The string method while they're fast asleep. It's definitely the riskiest and least accurate, but hey, desperate times call for desperate measures!
Are My Left and Right Hands the Same Size?
You'd think so, but almost never! It’s one of the most surprising things people learn during this process. For most of us, the fingers on our dominant hand are actually a bit larger—often by about a half-size. It makes sense when you stop to think about it; you use that hand for everything, so the muscles are more developed.
This is exactly why you must measure the specific finger on the specific hand where the ring will be worn. Don't just measure your left ring finger and assume it's the same for your right. Always measure the finger that the ring is intended for to guarantee a perfect fit.
How Accurate Are Those Plastic Ring Sizers?
Those little plastic adjustable sizers, the ones that look like a mini zip tie? They are honestly one of the best and most accurate tools for at-home sizing. They're way more reliable than a piece of string or paper because the plastic won't stretch or warp, giving you a true reading every time.
What I love about them is that they also mimic the feeling of a real ring sliding over your knuckle, which is a huge part of finding the right size! It’s a crucial test that paper and string just can't replicate. Many jewelers (including us!) will happily send you one for free or for a tiny fee. If you're investing in a meaningful piece of jewelry, using a plastic sizer first is a step I can't recommend enough.
Now that you're practically a ring-sizing pro, you can shop with the confidence that you're getting it right. At Wen-Kelli, we craft bold, beautiful rings designed for real life, and we want your piece to feel like it was made just for you.
Go ahead and explore our collection of durable, tarnish-proof rings and find your new everyday favorite. Shop the Wen-Kelli Ring Collection.
Article created using Outrank
